How to Clean Essential Oil Bottles
Why Is It Important To Clean Essential Oil Bottles?
It is important to clean essential oil bottles for several reasons. First and foremost, cleaning the bottles helps to prevent the growth of bacteria, mold, and other harmful microorganisms that can contaminate the oils. When essential oil bottles are not properly cleaned, there is a risk of these contaminants entering the oils, which can compromise their quality and effectiveness.
Additionally, cleaning essential oil bottles helps to remove any residue or build-up that may be left behind after using the oils. Over time, oils can leave a residue inside the bottle, which can affect the purity and potency of the oils. By regularly cleaning the bottles, you can ensure that they are free from any residue and are ready for the next use.
Properly cleaning essential oil bottles also helps to extend their lifespan. By keeping the bottles clean and free from any contaminants or build-up, you can ensure that they remain in optimal condition for a longer period of time. This will not only save you money in the long run, but it will also help to maintain the quality of the oils stored inside the bottles.
In addition to the practical reasons for cleaning essential oil bottles, there is also a safety consideration. If essential oil bottles are not cleaned properly, there is a risk of cross-contamination when using different oils. This can affect the purity and efficacy of the oils, and may even cause adverse reactions in some individuals. By regularly cleaning the bottles, you can minimize the risk of cross-contamination and ensure that the oils remain safe for use.
Check out our collection of Roller Bottles!
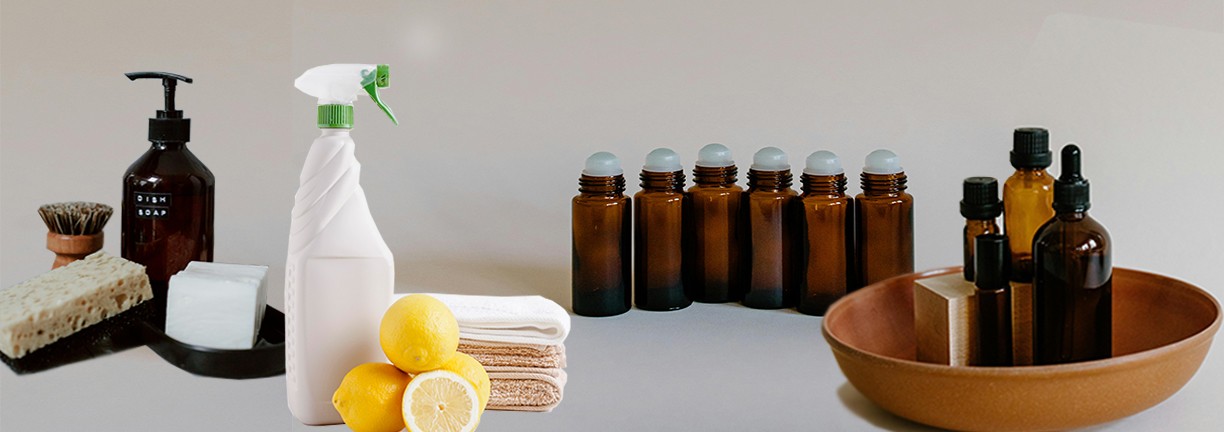
Gather Necessary Supplies To Clean Essential Oil Bottles
When it comes to cleaning essential oil bottles, it's important to gather all the necessary supplies before getting started. By having the right tools on hand, you can ensure that the bottles are thoroughly cleaned and ready for reuse.
First and foremost, you will need a mild dish soap or specialized essential oil bottle cleaner. This will help to remove any remaining traces of essential oil from the bottles, as well as any built-up residue. Additionally, you will need access to hot water, either from a sink or a kettle.
In addition to a cleaning solution, it's essential to have access to small cleaning brushes or pipe cleaners. These will help you to scrub the inside of the bottles, ensuring that all residue is removed. Additionally, you may want to have access to a bottle drying rack or a clean, lint-free cloth to dry the bottles thoroughly before using them again.
It's also important to have a dedicated space for cleaning the bottles, preferably on a clean and flat surface. This will prevent any accidental spills and allow you to focus on the task at hand.
By gathering all of these supplies before beginning the cleaning process, you can ensure that the essential oil bottles are cleaned effectively and ready for reuse. This will also help to extend the life of your bottles and maintain the quality of your essential oils.
Remove Labels And Residue From Essential Oil Bottles
Removing labels and residue from essential oil bottles is a fundamental step in ensuring the cleanliness and integrity of the bottles and the oils they contain. One of the primary reasons for undertaking this task is to prevent contamination. Labels and residue left on the bottles can serve as breeding grounds for bacteria, dirt, and other contaminants. These substances have the potential to degrade the quality of the essential oils stored within the bottles and may even cause them to spoil prematurely. We have highlighted some of the ways you can do this:
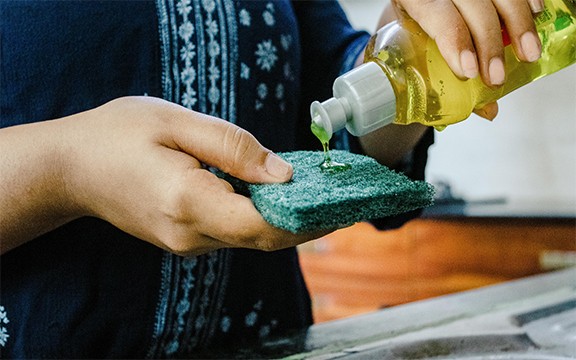
Using Hot Water and Dish Soap
One popular method for removing labels and residue from essential oil bottles is using a combination of hot water and dish soap. Simply soak the bottles in hot, soapy water for 10-15 minutes to loosen the labels and residue. After soaking, you should be able to easily peel off the labels and scrub away any remaining residue with a sponge or cloth.
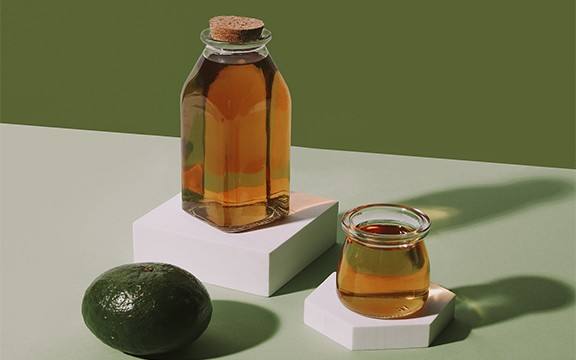
Using Citrus Based Solvent
Another effective method is to use a citrus-based solvent, such as lemon essential oil or orange oil. Simply apply the citrus oil directly to the labels and residue and let it sit for a few minutes. The natural solvent properties of the citrus oil will help to break down the adhesive, making it easier to remove the labels and residue with a little scrubbing.
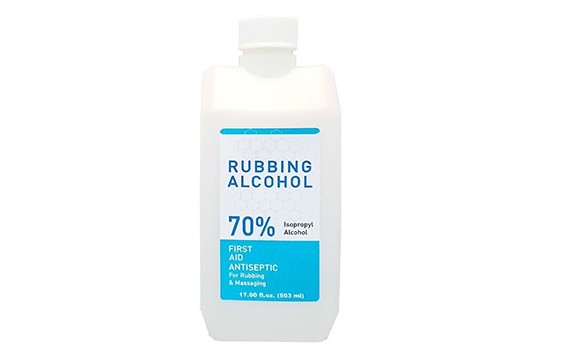
Using Alcohol
For more stubborn labels and residue, you can also try using rubbing alcohol or nail polish remover. Both of these solvents are great for breaking down adhesives and can be applied directly to the labels and residue with a cotton ball or cloth. Just be sure to wash the bottles thoroughly with soap and water after using these solvents to remove any residue and smell.
Once you've successfully removed the labels and residue from your essential oil bottles, be sure to give them a good rinse and let them air dry before using them for your next batch of essential oils. With a little patience and the right tools, you can easily repurpose your essential oil bottles and give them a new lease on life.
Clean Essential Oil Bottles Inside And Out
When it comes to using essential oils, having clean bottles is essential for maintaining the purity and effectiveness of the oils. Whether you're reusing old bottles or cleaning new ones before use, it's important to ensure that they are thoroughly cleaned inside and out. Here are four steps to clean essential oil bottles inside and out.
Step 1: Clean Oil Residues
Before proceeding with thorough cleaning, it's essential to eliminate any lingering oil residues from the bottles. This step ensures that subsequent cleaning efforts are effective and that the bottles are completely sanitized. Begin by pouring a small amount of rubbing alcohol or vodka into each bottle, swirling it around to dislodge and dissolve any remaining oil. Alternatively, use a cotton ball or swab to wipe the interior surfaces of the bottles, ensuring that all traces of oil are removed. Pay close attention to crevices and corners where oil residues may accumulate. By thoroughly cleaning oil residues in this initial step, you set the foundation for a pristine cleaning process, maximizing the effectiveness of subsequent cleaning efforts.
Step 2: Rinse with Hot Water and Soap
After removing oil residues, proceed to rinse the essential oil bottles with hot water and a mild dish soap solution. This step serves to further loosen any remaining contaminants and prepare the bottles for thorough cleansing. Begin by filling a basin or sink with hot water, ensuring that it's not too hot to handle. Add a small amount of mild dish soap to the water and mix it thoroughly. Submerge the bottles in the soapy water, ensuring that they are completely covered. Use a soft cloth or sponge to gently scrub the exterior surfaces of the bottles, paying attention to any stubborn stains or residues. Rinse the bottles thoroughly with clean, hot water to remove any soap residue. This step effectively cleans the bottles, leaving them free from dirt, grime, and soap residues, ready for sanitization.
Step 3: Sanitize
The final step in the cleaning process involves sanitizing the essential oil bottles to eliminate any remaining bacteria or germs. Sanitization is crucial for ensuring that the bottles are safe for storing and using essential oils. To sanitize the bottles, prepare a solution of equal parts water and white vinegar in a clean basin or container. Submerge the bottles in the vinegar solution, ensuring that they are fully immersed. Allow the bottles to soak in the solution for at least 10-15 minutes to effectively kill any remaining bacteria or germs. After soaking, remove the bottles from the solution and rinse them thoroughly with clean water to remove any vinegar residue. Allow the bottles to air dry completely before using them again or storing them. This final step ensures that the essential oil bottles are thoroughly sanitized, ready to be filled with fresh oils and used safely.
Drying Essential Oil Bottles after Cleaning
While each step in the cleaning process of essential oil bottles holds significance, ensuring thorough drying stands out as a critical component. Beyond merely cleansing, proper drying is pivotal for maintaining the bottles' cleanliness and integrity. This final stage is paramount in eliminating residual moisture, safeguarding against mold or mildew growth, and preserving the purity and efficacy of the oils stored within. Let's delve into step four: emphasizing the importance of letting the bottles dry effectively as a fundamental aspect of the cleaning process.
Here's how to effectively dry the bottles:
Air Drying
The most straightforward method for drying essential oil bottles is to air dry them naturally. Place the cleaned and sanitized bottles upside down on a clean, lint-free towel or drying rack. Position them in a well-ventilated area away from direct sunlight or heat sources. Allowing air to circulate inside the bottles helps expedite the drying process. Depending on the humidity levels and the size of the bottles, air drying may take several hours to overnight.
Towel Drying
Towel Drying: If you're in a hurry or prefer a quicker drying method, you can use a clean, lint-free towel to dry the bottles manually. Gently pat the exterior and interior surfaces of the bottles with the towel to absorb excess moisture. Take care to avoid leaving behind any lint or fibers on the bottles. Ensure that all moisture is removed, paying special attention to the bottle openings and crevices.
Using a Hair Dryer
For a faster drying option, you can use a hairdryer set to a low or cool setting. Hold the hairdryer several inches away from the bottles and move it around to evenly distribute the airflow. Be cautious not to use high heat, as it may damage the bottles or cause them to deform. Use this method sparingly and only if necessary to expedite the drying process.
Once the bottles are thoroughly dry, visually inspect them to ensure that no moisture or residue remains. Check both the interior and exterior surfaces for any signs of dampness or water spots. If needed, allow the bottles to air dry for additional time or use a clean, dry cloth to remove any remaining moisture.
Store Essential Oil Bottles Properly
Storing essential oil bottles properly is essential for maintaining their quality and effectiveness over time. Improper storage can lead to degradation of the oils, diminishing their aroma and therapeutic properties. Here are some important tips for storing essential oil bottles:
-
Keep them in a cool, dark place: Essential oils are sensitive to light and heat, which can cause them to degrade and lose their potency. Store your essential oil bottles in a cool, dark place, away from direct sunlight and extreme temperatures.
-
Use dark glass bottles: Essential oils should be stored in dark glass bottles, such as amber or cobalt blue, to protect them from light and UV rays. Avoid using plastic containers, as they can react with the oils and degrade their quality.
-
Keep them tightly sealed: Properly sealing your essential oil bottles is essential to prevent the oils from evaporating and losing their potency. Make sure the caps are tightly closed after each use to maintain the integrity of the oils.
-
Avoid exposure to air: Oxygen can cause essential oils to oxidize and degrade over time. Keep your essential oil bottles tightly closed and minimize the exposure to air to preserve their freshness and potency.
-
Store them upright: Storing essential oil bottles upright can help prevent leakage and ensure that the oils are properly sealed. This also helps to prevent the volatile aromatic compounds in the oils from evaporating.
-
Label and organize: To avoid confusion and mix-ups, label your essential oil bottles with their names and date of purchase. Organize them in a designated storage area to keep track of your collection and easily access the oils when needed.
Proper storage of essential oil bottles is essential in maintaining their quality and effectiveness. By following these simple tips, you can ensure that your essential oils remain potent and beneficial for a long time.
Conclusion
In conclusion, maintaining clean essential oil bottles is crucial for preserving the integrity and effectiveness of the oils they contain. Through regular cleaning, you prevent the growth of bacteria and mold while removing any residue that may compromise the oils' quality. Moreover, proper cleaning extends the lifespan of the bottles and reduces the risk of cross-contamination between different oils, ensuring their safety and efficacy. By following the outlined steps for cleaning and storing essential oil bottles, you can safeguard the potency and purity of your oils, allowing you to fully enjoy their therapeutic benefits for an extended period. Remember, a little care in cleaning goes a long way in preserving the vitality of your essential oil collection.
Articles that you might be interested in
Essential Oil Recipes for Your Roller Bottles
How are Cigars Made: From Farm to Table
A Beginner's Guide to Different Types of Cigars
Roller Oil Bottles: The Perfect Travel Companion for Essential Oils
Cigar Punch vs Cutter: Which Tool Will Enhance Your Cigar Smoking Experience?
